Tuesday, January 4, 2011

Car Trash Bag

I have been wanting a garbage container for the van and though my husband's idea of just putting a little trash can in there was very practical, I hoped to create something a little more pretty. I found this idea this morning:

I liked how the bag was made from things that were sitting in my closet anyway, because I didn't have to buy oilcloth or something. The outer fabric is an old shirt, the inner lining fabric is from a suit jacket my hubby had that the sleeves were cut off of (don't know why!) and the sour cream container and grocery bag were headed for recycling anyway! And I really liked how the thing is 'lined' with a disposable grocery bag! That makes cleanup really easy later!
Now I just have to get the family to use it! :)

Sunday, January 2, 2011

T

This was an idea I saw in a book from the library (decorating with papercraft by Clare Youngs). I thought it would be a great addition to our sunroom, which I dream about decorating with maps and stuff. I cut a "T" with my Cricut, and used it as a template to cut two T's from cardboard. Then I used strips about 1.5 inches wide to space the two T's apart. I used masking tape to hold it all together.
Then I took maps from a stash I have had for ages, and tore them apart and Modge Podge-d them all on. I covered it with a clear coat of acrylic spray and put it right on top of the TV cabinet.
Now to get some fun maps for the walls, so it will match something! Maybe on my upcoming vacation where I'll brouse through antique stores for days.....ahhhhh.......

Tuesday, December 7, 2010

Manger Magnets

I had an idea I couldn't help but get to doing today! I took one of those magnets from off the front of phone books and removed all the paper off the front. To do it, I peeled off the original picture and was left with a bunch of white. Then I wet it and scraped it off with one of those Pampered Chef brown square plastic scraper-things.

Once I got it down to black, I cut the stable, manger and star out and put it on the fridge and here it is!

I am glad I practiced up on my paper cutting earlier in the year, or I don't think I would have attempted this project. It was quick and easy though with an exacto blade and a cutting mat. These magnets are really thin and easy to work with.

My plan for this magnet set is to put it on my mailbox (which is also white) and I think if it can survive the wind & cold out there, that is just where it will stay! I love the look of the black sillouette and the simplicity of it, and had been wanting to decorate up the mailbox for Christmas. But if it won't stay put out there on the mailbox, it's coming back in for the fridge! :)

Saturday, December 4, 2010

5 Minute Snowballs

I made a few of these 5-minute ornaments today.


I found this frilly, white yarn, some crochet cotton, and a bow-maker in my craft closet.
Then I made a pom-pom. For those who don't know how that works, I took a photo. I used my bow-maker to hold the yarn. Wrapped it around 50 times, and then tied a doubled over piece of crochet thread tightly around the center (I left the loop on the crochet thread long and used it to hang it on the branch). Then I cut the ends, so there weren't any loops on the frilly yarn, fluffed (I recommend doing this outside, it was really messy!)


They show up so well on the tree and were so easy and my little girly-girl loves it!

Saturday, November 13, 2010

Wooden Turkey

I found my inspiration for this project here:


I used her example, but did things a little differently - mostly to save time/effort. I used a yard timber to give my turkey a little thicker and rounded belly. I STAMPED my sticks instead of adhering paper to them. I also dyed the nose and red-hangy-thingy (which I cut on the band saw from another tongue depressor) with my stamping ink. It took me less than 2 hours (if you don't count the glue drying time!) She explains things so well in her tutorial, I don't think you'll need any more info from me!

Give Thanks Banner


I have been wanting to make one of these for a long time, but as we don't have a mantle, I didn't think I'd have a place for it. The thought occurred to me this week that I could put it on the piano. So I got to work. This was a fairly quick project. I cut the "flags" in 3x4 rectangles and used my brayer and brown ink to distress them. Then I glued white die cut letters onto bluish circles and patterned cardstock scalloped circles. I thought they needed a little more pop, so I glued a white scalloped circle the same size under the patterned one so you could just see the scallops. Then glued these to a brown rectangle and onto the tag. To dress up the top a little, I put a 1/2" circle where I wanted to punch the holes and then punched them. I strung this on twine (can I just say that I am VERY excited that twine was on many of the crafts I looked at this week! I love the earthy look and it reminds me of my parents!) I tied little pony beads on the end of the twine to keep it under the piano top and stuck the ends in there. Once I got the spacing right, I thought it needed a little more umph, so I added ribbons, tied on to the twine randomly, between the flags. I took a close-up so you could see the specifics better. Now maybe I can resist a little longer taking down the fall decorations to put up the tree!!
What do you think? Do you think they need something else?

Tuesday, November 9, 2010

ASK Sign

I have been wanting to have a long sign to hang in my photo area in the living room to offset the small frames. I decided to use the opportunity of my hubby being out of town to make one myself! It started out like this:


I wanted to try Modge Podge (My new favorite craft item!! Why have I never used this before??) with letters that I cut out of paper using my Big Shot Die Cut system. So, I got to work. I cut all the letters from white cardstock.


And I needed a background. A blue one. Then it hit me, I had this shirt I'd been saving for a project....So, I cut the fabric from the back of the shirt to match the board that I found, already a good size, in my hubby's shop (Here's to hoping he didn't already have a plan for this board!)
I put on the fabric, then put on the letters, then realized I had NO IDEA what to do with the empty space. So I set it aside for a while. I came back to it when I realized I had flower die cuts too! So I cut out a bunch of flowers, and this was almost what I ended up with:


Then I emailed back and forth with my patient husband to get an opinion - I can't craft without someone else's opinion - which some of you know already! And on his suggestions I made a few changes. I modified some of the flowers with scissors for more variety - like the burst looking one was the same as the one on the upper right before my scissors got to it! And I added curlies and dots and stuff. Then we were pretty happy with it. So, I gave it a coat or two of Modge Podge, painted the edges the same color as my accent wall in the living room and added hangers. Yeah, I know you can't get the full effect with the frames turned around, but I'm not about to put my whole family on this blog! :)

Monday, November 1, 2010

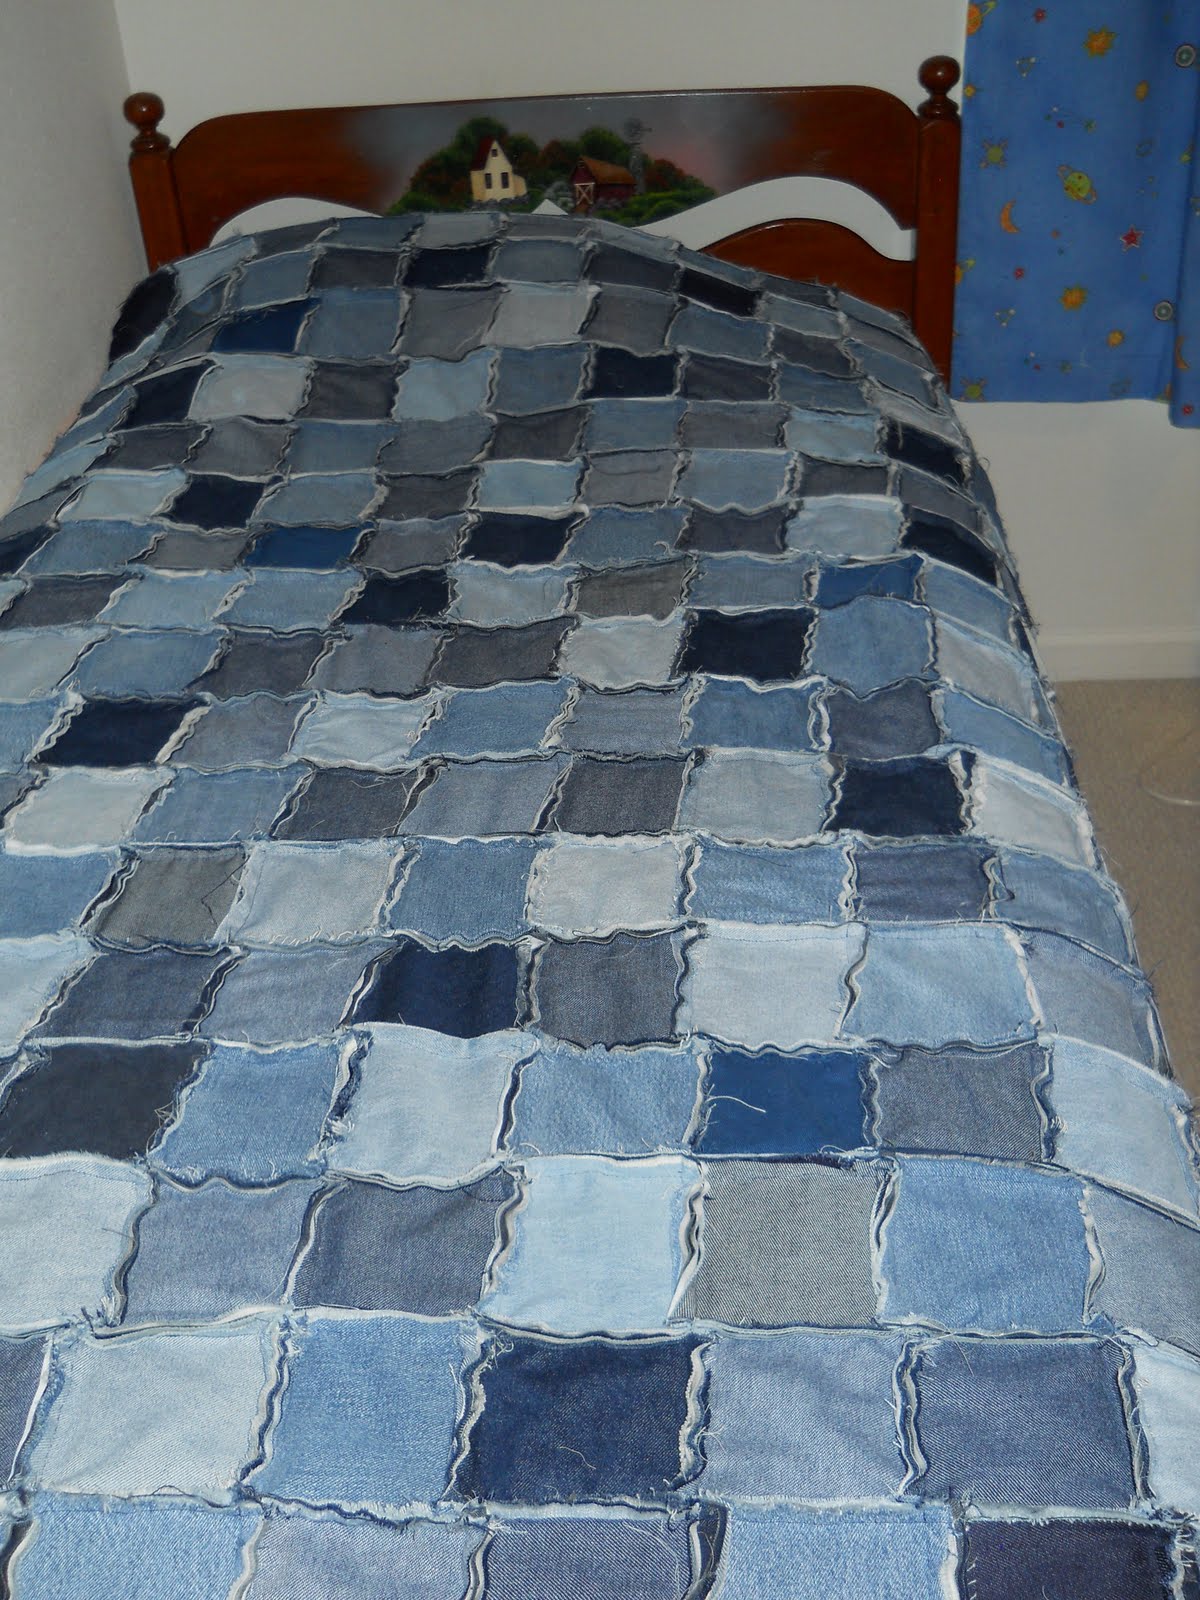
My First Quilt

My husband took the kids for a couple days so I could concentrate. So they played and shopped and I locked myself into the sunroom to sew. I got the inspiration for this quilt from a blog that I follow called Home Joys. I gathered denim from all the grandparents and cut these squares months ago, but was waiting for a time to sew them, and my hubby allowed me to concentrate on it this weekend. First, I set all the squares out in a random pattern that I liked.


Then I layered the top square, a square of an old sheet and another denim square for the back. I sewed it to the next square (layered) with the seam exposed on the top. My sister had given me a tip ages ago to sew a line together, then another line together, then sew the lines to each other. This is what I did.


When finished, I put it in the dryer to unravel. Unfortunately, it did not do as I would have liked, so I'm hand-unraveling it. Me and my ripper will be boosom buddies before this job is finished! I anticipate that I'll just go and unravel a few rows when I have time. I am so glad to give him this quilt of heritage and warmth! I hope he grows to love it and it's meaning!

Tuesday, October 26, 2010

Pallet Book Shelf

I found this Pallet Shelf on a website this month, and immediately wanted to make it for our little guy's room. He's really into construction, as all little boys are. Here is our version:

I started this shelf with my husband not at home, but when I restarted with him at home, he jumped in to help. And boy am I glad he did! This was NOT A 5 minute job! It took us an entire evening together, after I had worked a whole nap time on it too.

Anthropologie Copy

I attempted to copy the Verevine Necklace from Anthropologie, because I thought it was beautiful, but would NOT spend $42 on it!

I tried a bunch of different things, had a lot of things I had to re-do, but this was the final product. My knock-off:

I took the photo on two different shirts to let you see it well.


While I am aware that mine looks nothing like theirs, except in general structure, I am pleased with the final product. Now I just have to have enough guts to wear the thing!

Friday, October 1, 2010

Kanzashi Butterfly Ornament

I have started working on Christmas ornaments! I like to give a different one each year and I am bound & determined to have them finished for the season. This is not the one I'm making to give everyone, and I had never made one of these, so I thought I'd share a photo:
It is made with fabric, using a kanzashi fold. The larger wings are simply a larger square of fabric. Then you put a string through the wings at the bottom (order: small, lg, lg, small) the same way you would a kanzashi flower petal and they gather together to make the shape of the butterfly. I hot glued on a piece of black cording I had that is kind-of flat and put a hanging string through the back of one of the large wings.
I know I hung it on a pineapple plant...I do like to put my Christmas tree up early....but even I can't do it this early!

Saturday, September 25, 2010

Happy Birthday Taylor!

I made these for the 15 year old across the street's birthday party today. I hope she actually likes them and wears them! :)

Friday, June 25, 2010

Crochet "O"

My mom had a framed filet crochet "O" that my sister made in her bathroom. It was backed with a peach floral fabric to match her bathroom, but after their recent remodel of the bath, it no longer matched. I told Mom that I'd take it and make it match her brown bath. This is what I came up with.

I took the cardboard out of the frame and used a roller to roll brown ink all over to give a leathery appearance to the backing. Then cut the fancy corners with the cuttlebug Mom had given me a while back. Then put it all together. It was a pretty easy project, and I love taking something that is no longer useful (did not match) and making it beautiful again! I hope she likes it!

Tuesday, May 11, 2010

Pink Earrings


I made these the same as the green pair in the last post, but different size ring and different beads. I am liking these earrings! Especially since it is so easy to customize a color! That embroidery floss is in every color imaginable!

Saturday, May 8, 2010

Green Earrings


A pair of earrings that I created today. I made the green circle from getting a plastic washer and knotting around it with embroidery floss. Then topped it with beads I already had and put it on wire. Lightweight and showy. I like it!